Google ReCaptcha is a popular security tool used by websites to protect against spam and other forms of automated abuse. It is designed to distinguish between human and machine-generated traffic, helping to prevent bots from spamming forms or accessing restricted areas of a website.
Table of Contents
Implementing ReCaptcha on a website is a simple process, and in this article, we will go through the steps involved in doing so.
What is Google ReCaptcha?
Google ReCaptcha is a free service provided by Google that helps to prevent automated software from engaging in abusive activities on websites. The service works by using advanced algorithms to determine if the user is a human or a machine.
If the service determines that the user is a machine, it will prompt the user to complete a challenge, such as solving a puzzle or identifying objects in an image.
Related: How to add an overlay to your webpage?
Steps for Setting Up Google ReCaptcha
Follow the 3 simple steps to set up Google reCaptcha:
1. Sign up for a ReCaptcha account
The first step to implementing ReCaptcha on your website is to sign up for a ReCaptcha account. You can do this by visiting the ReCaptcha website and creating a new account.
2. Add a new site to your account
Once you have signed up for an account, you will need to add a new site to your account. You will be asked to enter your website’s domain name and select the type of ReCaptcha you want to use.
3. Get the Site Key and Secret Key
After adding your site, you will be provided with a Site Key and a Secret Key. These keys are used to integrate ReCaptcha into your website.
Also read: How to Add Custom Class to WordPress Widgets
Steps to Integrate Google ReCaptcha into Your Website
Follow the below steps in order to integrate reCaptcha into the website:
1. Adding the ReCaptcha API to Your Website
The first step in integrating ReCaptcha into your website is to add the ReCaptcha API to your website. You can do this by adding the following code to your HTML file:
<script src='https://www.google.com/recaptcha/api.js'></script>
2. Adding the ReCaptcha Widget to Your Form
Once you have added the API to your website, you will need to add the ReCaptcha widget to your form. You can do this by adding the following code to your HTML file:
<div class="g-recaptcha" data-sitekey="your-site-key"></div>
Replace “your-site-key” with the Site Key that you obtained in the previous step.
3. Verify the ReCaptcha Response on the Server
The final step in integrating ReCaptcha into your website is to verify the ReCaptcha response on the server. This can be done using a server-side language such as PHP. You can use the following code as a reference:
<?php
$recaptcha_secret = "your-secret-key";
$response = file_get_contents("https://www.google.com/recaptcha/api/siteverify?secret=".$recaptcha_secret."&response=".$_POST['g-recaptcha-response']);
$response = json_decode($response, true);
if($response["success"] === true) {
    // ReCaptcha was successful, continue with form processing
} else {
    // ReCaptcha was unsuccessful, show an error message
}
?>
Replace “your-secret-key” with the Secret Key that you obtained in the previous step.
Related: How to add Cookie notice on your website
Advanced Features of Google ReCaptcha
Here’re some advanced features of Googe reCaptcha that insist us to use it:
1. ReCaptcha v2
ReCaptcha v2 is the most widely used version of ReCaptcha, and it is the version used in the example code in the previous section. In addition, reCaptcha v2 is designed to be as user-friendly as possible, with a minimal impact on the user experience.
2. ReCaptcha v3
ReCaptcha v3 is the latest version of ReCaptcha, and it is designed to run in the background, without any user interaction required. In addition, reCaptcha v3 uses an advanced algorithm to determine the user’s risk level, and it can be used to block spam before it reaches your website.
3. ReCaptcha Invisible
ReCaptcha Invisible is a version of ReCaptcha that is designed to be as unobtrusive as possible. In addition. reCaptcha Invisible runs in the background, without any user interaction required, and it is designed to be used on websites with high traffic volumes.
4. Custom Theming
ReCaptcha allows you to customize the look and feel of the ReCaptcha widget to match your website’s style. You can change the color of the widget, the size of the widget, and the language used by the widget.
Related: How to Add Google Tag Manager Script on Your Website?
Steps to Install and Configure Google ReCaptcha
You need to have a google account in order to use Google ReCaptcha. Create an account if you don’t have one. And, after you’re done with registering your google account follow the below steps.

1. Login into a google account
2. Click on the below link or copy-paste it into a new browser tab
3. On the webpage https://www.google.com/recaptcha/admin, you will have to register your website.
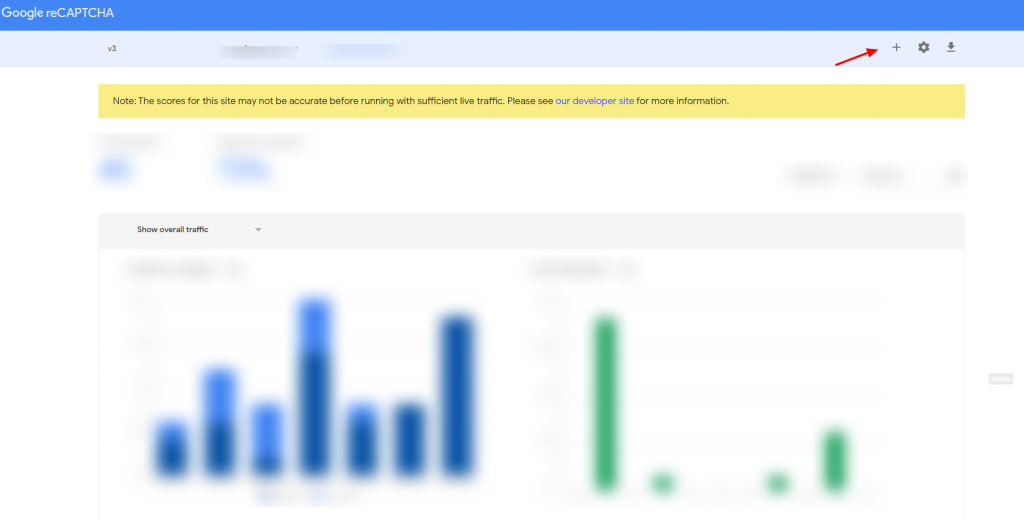
Please see the below image for clarification.

Click on the ‘+’ icon and enter your website details.
Now, you will need to enter a label/title, select captcha type (select v3 or v2) and enter your domain name, accept terms, and notification and click on submit button to proceed.

As soon as all details are validated, you will get the “site” key for the client end and the “secret” key for server end verification.

If you have a WordPress website with a Contact Form 7 plugin or any other plugin, you can copy-paste your site and secret key in the plugin configuration and you’re done.
The below steps are for custom integration.
How to Do a Custom Integration of Google Recaptcha?
Follow the following steps to do a custom integration:
Step 1: Client-Side Integration
a. Paste this snippet in the <head> or before the closing of <body> tag in your HTML template:
<script src='https://www.google.com/recaptcha/api.js'></script>b. Paste this snippet at the end of the contact form or before the form submit button.
This is generally placed where you would like the captcha to appear.
<div class="g-recaptcha" data-sitekey="XXXXXXXXXXX"></div>You can find the detail here: https://developers.google.com/recaptcha/
Step-2: Server Side Integration
When your users submit the form where you have integrated reCAPTCHA, you’ll get it as part of the payload a string with the name “g-ReCaptcha-response”.
a. secret (required)
b. response (required)
c. remoteip
You can find the detailed description here:
PHP Example Source Code: https://github.com/google/recaptcha
Also read: How to Implement Auto Suggestion in WordPress Search?
Conclusion
Google ReCaptcha is a powerful tool that can help to protect your website against spam and other forms of automated abuse. Implementing ReCaptcha on your website is a simple process, and you can complete it in a matter of minutes.


