
Google Tag Manager (GTM) can be used to make your conversion tracking easy by simply adding only one script on your website for almost all conversion trackings. And, then utilizing the Google Tag Manager account features to set up different conversion tags without messing up with the website time and again.
Table of Contents
In this article, we will cover the basics of GTM and its script, including the process to add Google Tag Manager script to website, the recommended location for the script, the ease of use for those without coding skills, the amount of time it takes to set up, the need for any changes to your website’s code, and the numerous benefits of implementing GTM on your website.
What is Google Tag Manager?
Google Tag Manager (GTM) is a free tag management system offered by Google that allows website owners to easily add and manage marketing and analytics tags (snippets of code) on their website, without having to make changes to the underlying code.
With GTM, website owners can add and manage tags for services such as Google Analytics, AdWords conversion tracking, and Floodlight, as well as third-party marketing and analytics services. GTM provides a user-friendly interface for creating and publishing tags, as well as debugging and testing them, without having to involve a developer.
By using GTM, website owners can save time and resources, and improve the accuracy and speed of tracking on their website.
Related: How to set up Goal Conversion tracking on Google Analytics (GA4) with Google Tag Manager
What is Google Tag Manager Script?
The Google Tag Manager script is a piece of JavaScript code that is placed on a website to enable the implementation of Google Tag Manager. The script provides a container for the tags that are managed through the GTM interface, and it is this container that allows website owners to manage the tags on their website without having to make changes to the underlying code.
The script is typically placed in the section of the website, and it should be placed on every page that needs to use GTM. Once the script is added, website owners can use the GTM interface to add, manage, and update tags on their website, without having to make changes to the code on their website.
The script is an essential component of the Google Tag Manager implementation and is required to make GTM work on a website.
Also read: How to Prevent Your Website PDF File From Getting Indexed in Google?
Steps to Add Google Tag Manager Script on Website
Let’s discuss 6 easy steps that you can follow to add Google Tag Manager script on website.
To start with, you can create your account on https://tagmanager.google.com/ by using your Gmail account.
Note*: You don’t need separate google analytics script on your website if you have configured Google Tag Manager.
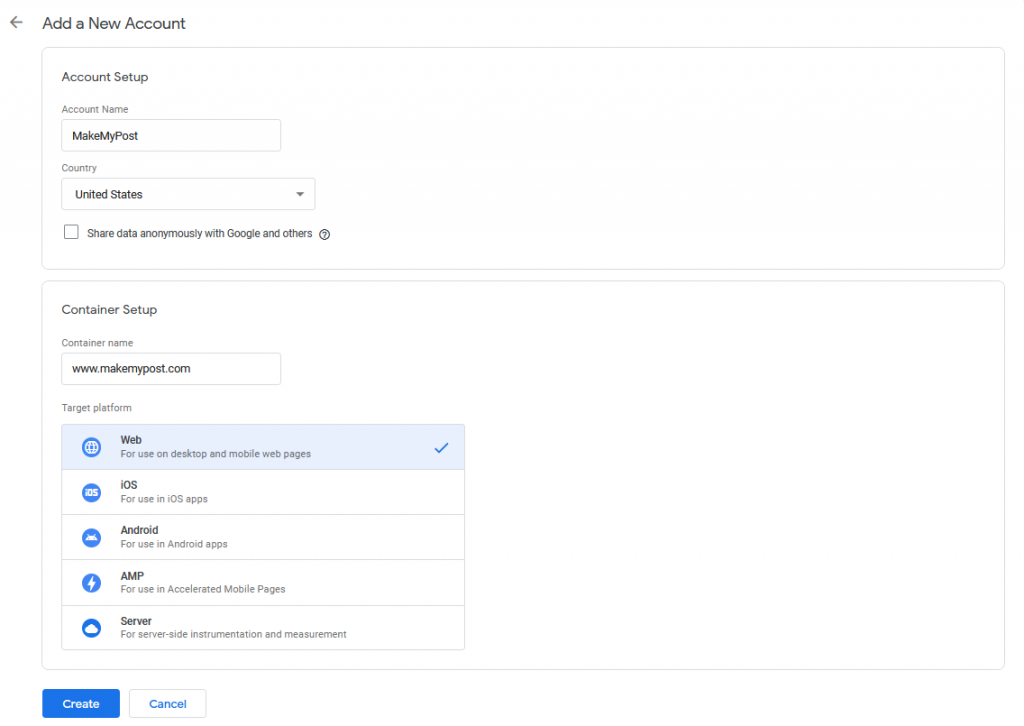
1. Add a New Account

Fill up details such as your business name, website address, and select “WWW” for setting up a tag manager for the website. And, finally, click on Create to proceed further.
Accept the Google Tag Manager Terms of Service Agreement by clicking on “Yes”.
On proceeding further, you will receive the following screen with the script that needs to be added in the head section as high as possible and after the opening of the body tag as close as possible.
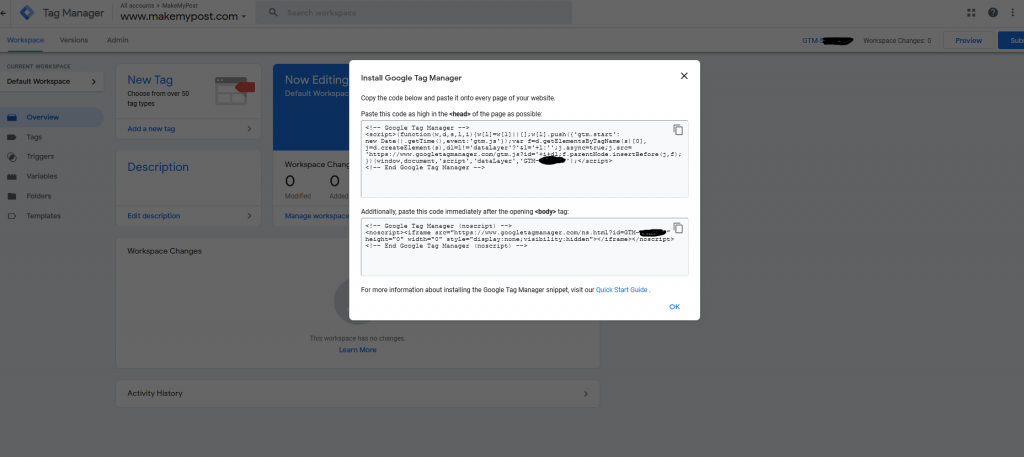
Copy the two scripts and save it somewhere in separate text files.
2. Add Google Tag Manager script to your webpage
Now, open your website header.php or header.html file or any other .php or .html file which you need to track.
Add the first script in the <head> part, it should be close to this tag. And, the second piece of code right after opening the <body> tag.
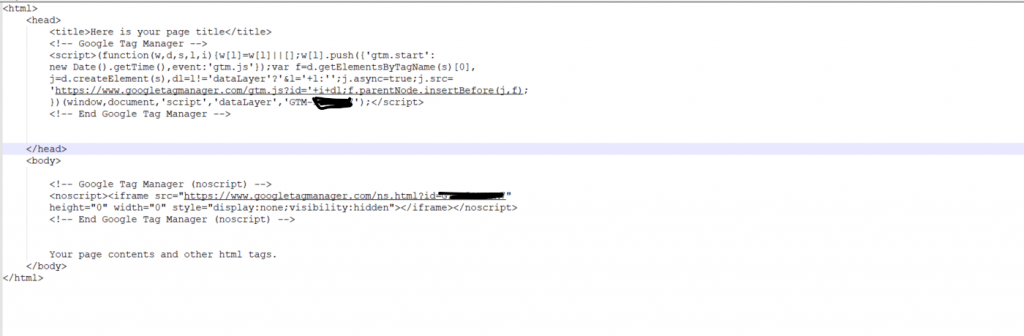
Now, save the file and make sure its updated and uploaded on the server as well. And, switch back to the Google Tag Manager Account.

3. Create a Tag for Google Analytics within your Google Tag Manger account
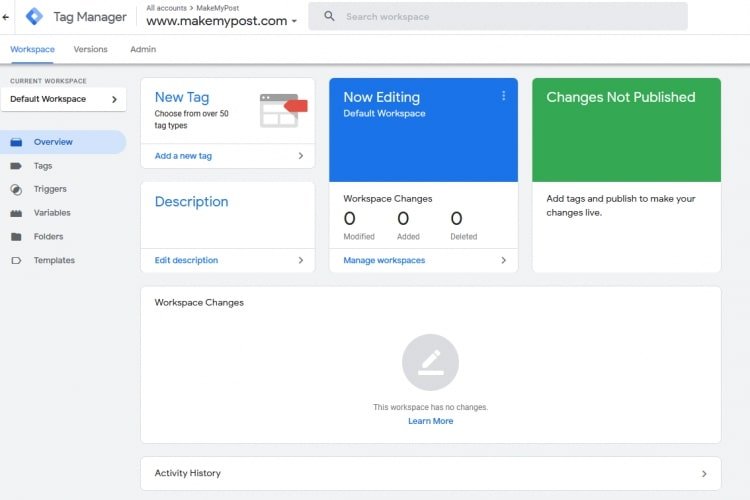
Click on Add a New tag or Tags from the left as shown in the above screenshot
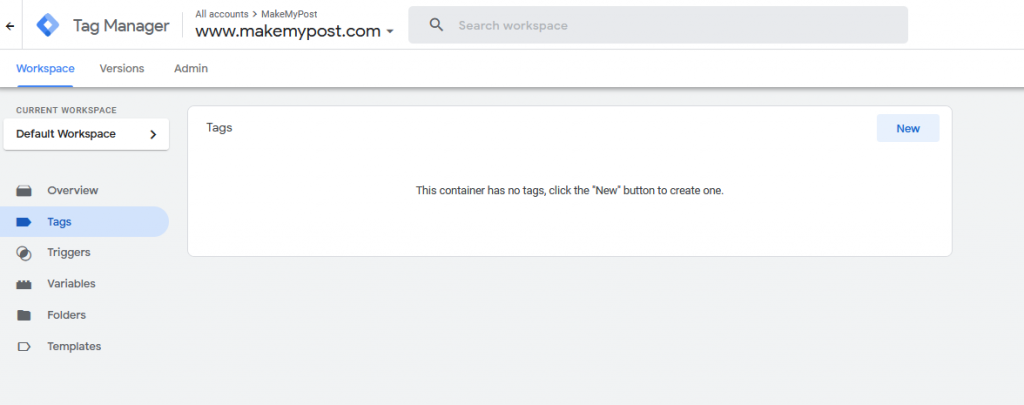
Click on New as shown in the above screenshot.
Add a name for this tag e.g. Google Analytics (by replacing Untitled Tag).
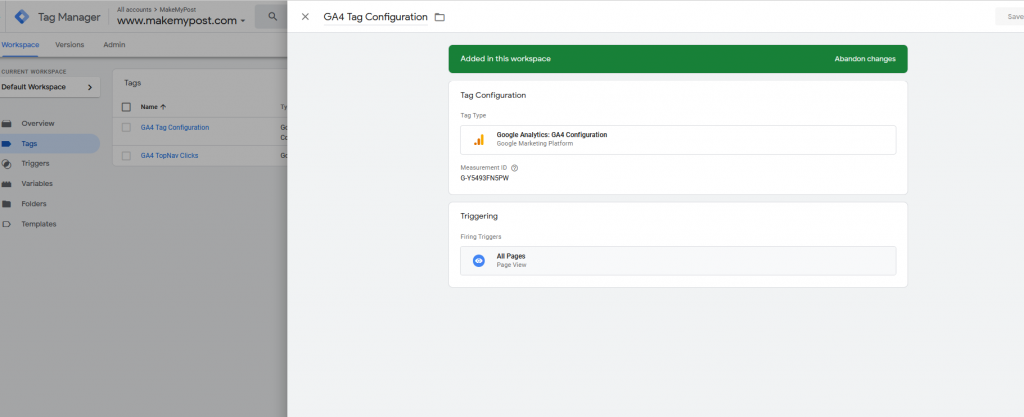
4. Add Tag Configuration
And, then click on Tag Configuration block
Click or select Google Analytics: GA4 Configuration
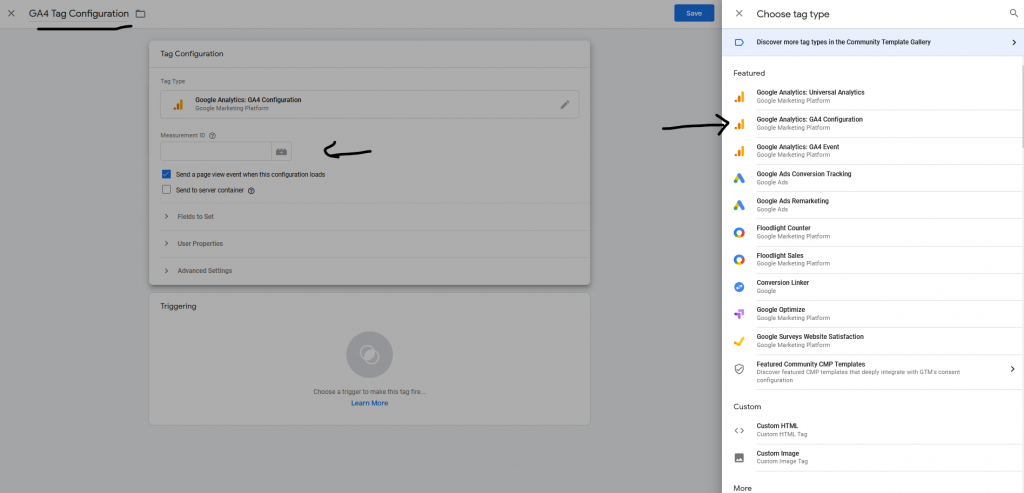
Change the name of “Untitled Tag” to “GA4 Tag Configuration” or anything you would like to keep.
5. Enter the Measurement ID.
The measurement id can be found in your analytics.google.com account.
Make sure you’re logged in to Google analytics account >> Click on Settings >> Data Streams >> Your custom data stream. You will see something like this.
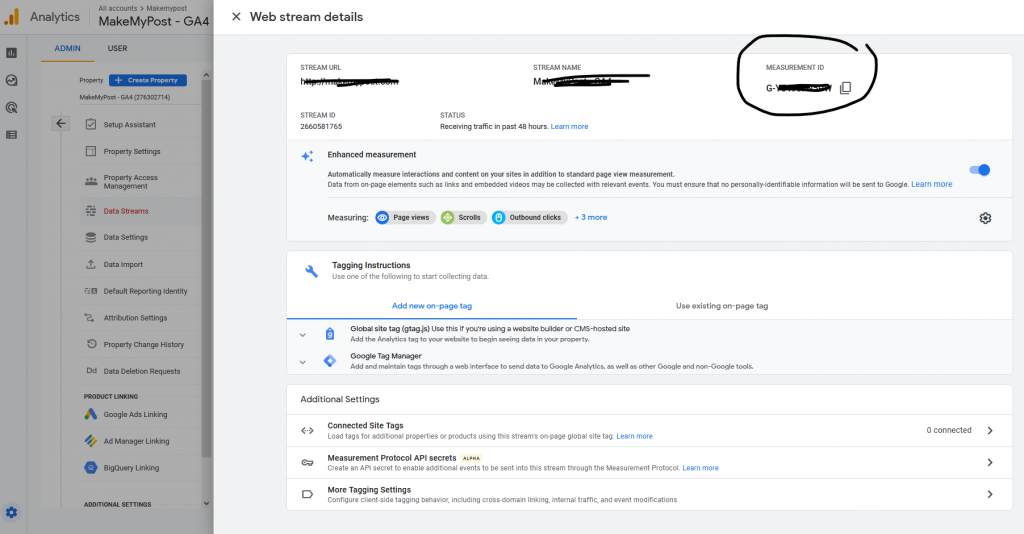
Copy the Measurement ID and enter it in the tag manager as explained above. And, Save the changes.
Now, leave the other settings as it is and add a trigger for this tag.
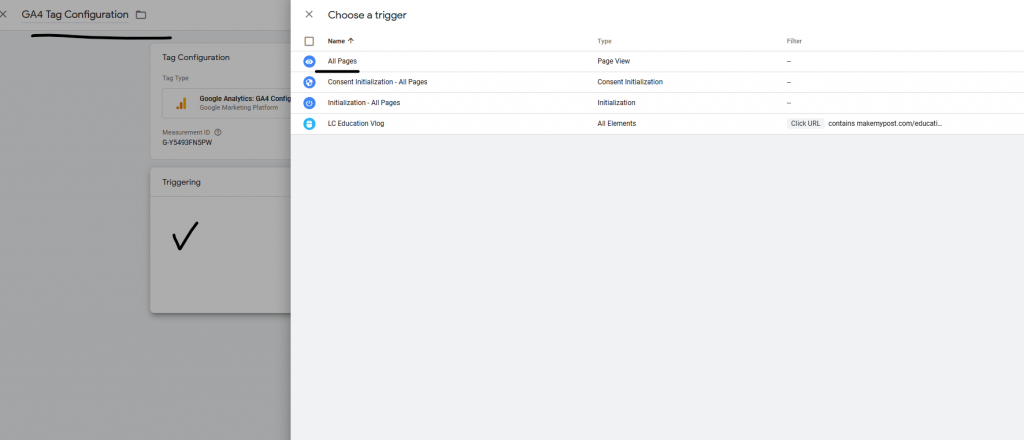
6. Add a Trigger
Once you have added the Tag configuration, you need to create a trigger for it.
The trigger will ensure the tag fires on specific events. In our case, we are trying to track all page views. So, the trigger will be as follows.
Click on the Trigger section and select “All Pages”
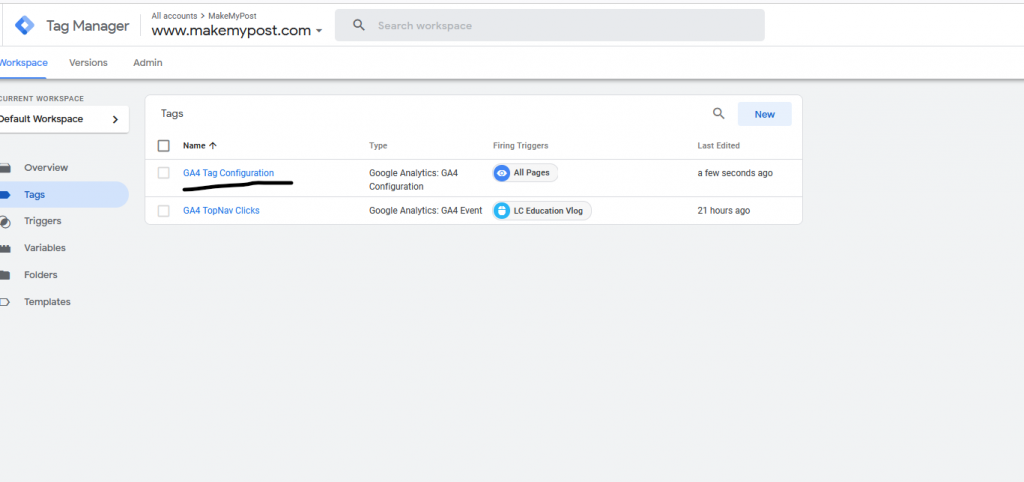
Save all the changes.
You will see the final screen as follows:
Save the changes.
You have successfully configured a Tag, Trigger, and variable.
And, now it’s time to publish the changes you have made to this Google Tag Manager account.
- Click on Preview to review the changes or make any corrections or final changes or simply click Submit
- Add a Version name, Version Description providing an insight on what you have done.
- Click on the Publish
- Wait for Google to save all these changes and publish… and that’s it. You’re done.
By now, you have successfully created your account on google tag manager, created a tag >> trigger, and linked it with your website. This will now start tracking your website just like the use of Google Analytics script. Additionally, it will offer a more dynamic approach to add as many tags and triggers as possible without making any unnecessary changes on the website end.
Related: How to zip files and folders on a server using PHP script?
Where Should I Place Google Tag Manager Script on the Website?
The Google Tag Manager script should be placed in the section of your website, right after the opening tag. It should be placed on every page of your website that needs to use Google Tag Manager. This is important because it ensures that the GTM container is loaded before other tags on your website, allowing you to manage and track your tags accurately.
Can I Use Google Tag Manager Script on the Website Without Coding Skills?
Yes, you can use Google Tag Manager on your website even if you don’t have coding skills. Google Tag Manager is designed to be user-friendly and does not require any coding skills. You can add the GTM script to your website using the GTM interface, and manage your tags using the GTM interface without having to make changes to the underlying code of your website.
The GTM interface provides a user-friendly interface for creating and publishing tags, as well as debugging and testing them, without having to involve a developer.
Also read: How to Customize Yoast Meta Description for Custom Post Types or Your Pages and Posts?
How long does it take to set up Google Tag Manager script on my website?
The time it takes to set up Google Tag Manager script on your website depends on the size of your website and the complexity of your tracking needs. On average, it should take no more than an hour to set up the GTM script and get started with Google Tag Manager. However, the actual time it takes may vary based on your specific situation and the amount of customization required for your tracking needs.
It is important to take your time to understand the GTM interface and its features to ensure a smooth implementation and accurate tracking.
Do I need to make any changes to my website’s code to add Google Tag Manager script?
No, you do not need to make any changes to your website’s code to add the Google Tag Manager script. The script is added through the GTM interface and does not require any changes to the underlying code of your website. You can add the GTM script to your website using the GTM interface, and manage your tags using the GTM interface without having to make changes to the underlying code of your website.
This makes Google Tag Manager a flexible and convenient solution for website owners who want to track and manage their website’s tags without having to involve a developer.
Related: 10 Best Practices for Designing a User-Friendly Website
Benefits of Adding Google Tag Manager on a Website?
The top 5 benefits of GTM are:
1. Increased Efficiency
Google Tag Manager streamlines the process of adding and managing tags on your website, making it easier and faster to implement tracking and marketing tools.
2. Improved Data Collection
With GTM, you can easily track user interactions and gather data on your website’s performance, which can help you make data-driven decisions to improve your website’s performance.
3. Better User Experience
GTM makes it possible to easily implement tracking tags without having to make changes to your website’s code, which can help preserve the integrity of your website’s user experience.
4. Enhanced Security
Google Tag Manager provides a secure environment for managing and tracking your website’s tags, reducing the risk of malicious code being added to your website.
5. Cost-Effective
GTM is a free service offered by Google, and eliminates the need for costly development resources, saving website owners time and money. Additionally, GTM can help improve website performance and increase conversion rates, which can result in increased revenue.
Also read: Top 10 SEO Plugins for WordPress Website
Conclusion
In conclusion, Google Tag Manager is a powerful tool for website owners that makes it easier to track and manage tags on a website. Adding the GTM script to your website does not require any coding skills and can be done through the GTM interface. The benefits of using GTM include increased efficiency, improved data collection, a better user experience, enhanced security, and cost savings.
Whether you’re a small business owner or a large corporation, GTM is a valuable resource that can help you optimize your website’s performance and make data-driven decisions to improve your online presence.